

How To Fix Keyboard After Water Spill
Accept you spilled h2o on your laptop or desktop keyboard and need help getting it fixed? In this commodity, nosotros take a look at the all-time solution for getting yourself out of such a frustrating situation.
It's common knowledge that h2o and electronics do not mix well. In many cases, h2o tin completely fry electronic equipment and terminate it from working entirely. Thankfully, for keyboards, it'southward very possible to fix them by removing the wet.
It's likewise possible, although more than difficult, to repair a laptop keyboard after it has been h2o damaged.
How to Gear up a Water Damaged Keyboard for Desktop PCs

Fixing a h2o damaged keyboard is usually quite easy so long as you accept the necessary steps and yous are cautious during the repair.
The first step is to unplug your keyboard from your PC so that power no longer gets to information technology. On most keyboards, especially cheaper membrane ones, a little water won't necessarily damage your keyboard at all.
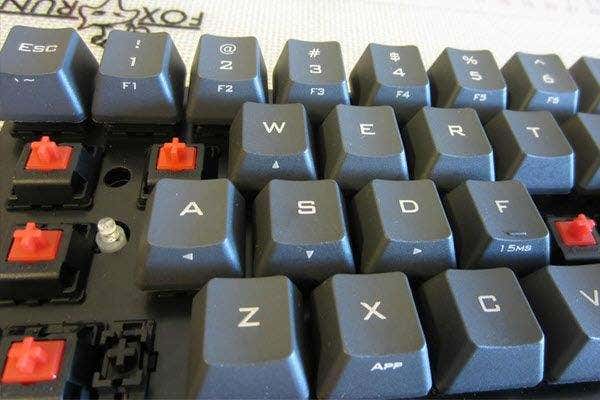
For more complicated mechanical and gaming keyboards that frequently have extra circuitry, there's the potential for long-lasting damage, and the repair process is a petty more complex, but the general concept is the same.
For this guide, nosotros'll exist using a standard office membrane keyboard as an example. You lot can follow the same steps with your own keyboard, simply if you get stuck somewhere along the way, you lot may demand to look upwardly a step by step disassembly guide online for your specific keyboard.
The overall goal is to disassemble the keyboard piece by piece so that we can remove any wet.
To offset, accept a picture of your keyboard – you'll need this for reference later.
Next, start by pulling out all of the keys. Almost every keyboard has keys that tin pop in and out without causing any damage. You may need a pocket-size lever to pull the keys out. Consider using a screwdriver or penny. Brand certain to put the keys somewhere safe and so that they do not get lost.
With all of the keys out, the next step is to motility onto the back.
Flip over your keyboard and remove the screws one by i. Eventually, y'all'll be able to remove the top layer of the keyboard to get to the underlying layer. If this is a membrane keyboard, you'll find ane or two thin membrane layers that cover the entirety of the keyboard.

The next goal is to remove the membrane layers – they should simply slide out. Sometimes there will also be a metal frame that can as well be unscrewed or pulled out.
Later that, all of your components will exist separated. Your next goal will be to carefully wipe down all components with a dry towel. You lot demand to ensure all moisture is soaked upwards.
If you lot have spilled juice or soda and your keyboard is now sticky, you may need to purchase some alcohol swabs to wipe off the residuum.
In one case all of the moisture has been removed, you can re-assemble the keyboard. But follow the steps yous took to disassemble the keyboard, only in reverse. It's as well a good idea to leave the keyboard disassembled for 12 to 24 hours so that whatever hidden moisture can evaporate off.
Refer to the original photo you took for placing the keys back in their original position.
In nigh all cases, this will ready your desktop keyboard. Go on in mind that more complex keyboards with LEDs or extra functionality may require more disassembly and there is also the run a risk that your keyboard may be broken beyond repair.
In this case, you should contact the manufacturer to see if they offer repairs or replacements.
How to Set a Water Damaged Laptop Keyboard
Fixing a laptop keyboard is more hard because there'due south the gamble the moisture could arrive contact with other of import circuitry in the laptop and crusade further damage.
The offset step is to power off your laptop and remove the battery immediately. Adjacent, hold the power button downwardly to ensure in that location is no remaining charge in the laptop components. The sooner you power down your laptop, the less hazard there will be for damage.
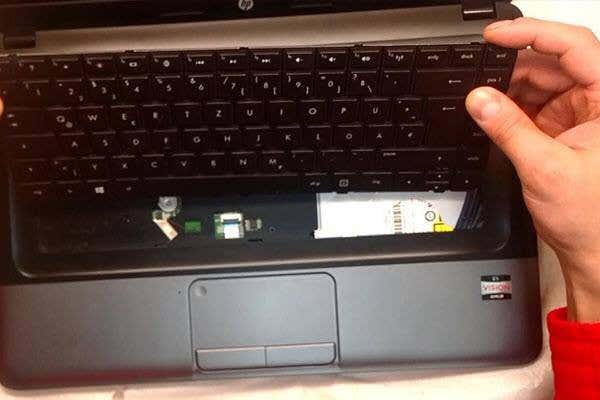
The next step will be for y'all to disassemble your laptop and wipe it down. The disassembly process volition depend on the laptop model y'all own.
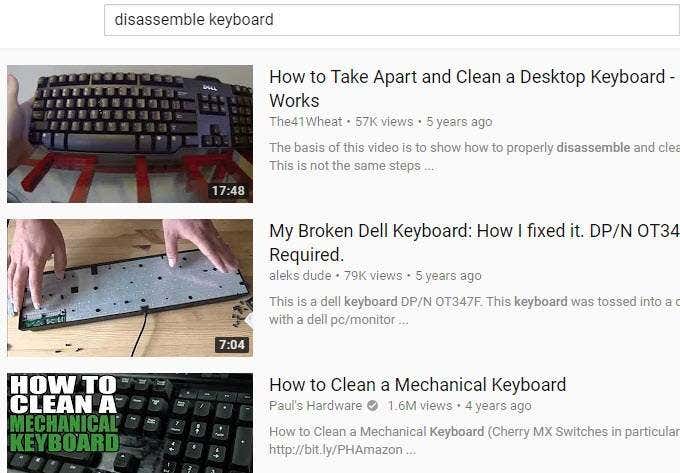
Thankfully, there are disassembly guides for virtually every laptop model on the planet (search on YouTube) and almost laptops are built specifically for easy disassembly.
Some laptops are harder to disassemble than others, however. For some, you'll get by on just a screwdriver. For others, you may need specific tools that are usually plant in laptop repair kits.
Another keen online resources for DIY repairs is iFixit. They accept an entire section on repairing various types of keyboards with pace by stride instructions, screenshots and sometimes even videos.

The end goal over again is to remove all moisture from within the laptop. This procedure can exist lengthy and will require patience and circumspection, only with the correct guide, yous should be fine.
If your laptop worked before y'all close information technology down for the repair process, chances are information technology'll work over again in one case yous make clean up all of the moisture.
Summary
In summary, if your keyboard still works after water impairment, merely acts erratically, usually cleaning the keyboard and removing wet volition fix it and render usage dorsum to normal.
Yet, if the laptop or desktop keyboard stops functioning entirely, there's a chance that information technology may exist broken beyond repair.
Either fashion, the merely method for a potential prepare is to advisedly disassemble the desktop keyboard or laptop and remove all moisture.
Did this guide help? Let us know your thoughts. If you accept whatsoever queries, delight don't hesitate to ask the states for communication.
Do not share my Personal Information.

How To Fix Keyboard After Water Spill,
Source: https://helpdeskgeek.com/how-to/how-to-fix-a-water-damaged-keyboard/
Posted by: mcintireoppoichest.blogspot.com
0 Response to "How To Fix Keyboard After Water Spill"
Post a Comment